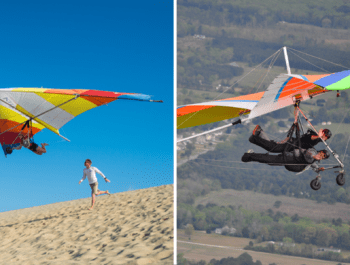
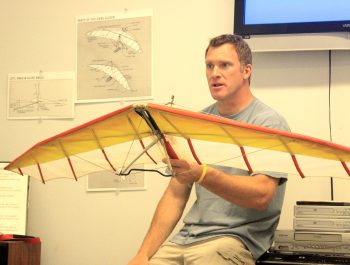
Steer by shifting your weight.
Control your speed with the bar.
… that’s JUST ABOUT IT!
What does it take to fly a hang glider? If you had asked me that question before I started taking lessons 16 years ago, I probably would have answered “guts,” or something to that effect. My impression of what lessons would be like involved all kinds of bravery and superman inspired nobility, hard and rocky cliff ledges, and ego inspiring acts of fearless accomplishment. It’s a good thing I was wrong, since if those things were required I never would have been able to earn my ratings. I have a very strong sense of self-preservation, and my big worry back then was that my reluctance to do something dangerous would hurt my progress. As it turns out, my reluctance to do something dangerous has aided in my flight career. Hang gliding, as a sport, is not attractive to reckless and fearless types. Proving bravery isn’t why we do it. The people who stick with it are the people who just love the feeling of flying. This could include you!
questions that you might ask:
- What is the hard part about taking hang gliding lessons?
- How fast must a person be able to run?
- How much upper body strength is required?
These are very common questions, with a common theme. The theme illustrates the natural reluctance people may have when the idea of hang gliding lessons is discussed. The truth is that what is most required is the desire to do it. It is worth it, it is SO worth it. The weight shift is practically effortless if the conditions are mellow, so steering left and right and pitch changes are very, very easy to manage and don’t require unusually large amounts of upper body strength. The flying is as described above, and is best learned by tandem instructional flights (see YouTube video below). It only takes one or two tandem flights for most people to learn to coordinate the pitch and roll inputs. The foot launch, however, is the most essential part and does require a good deal of time on the training hills.
two helpful tips for your initial training
Beyond the desire to fly, there are two areas of skill that require focus and concentration during your initial training hill foot launching practice sessions.
- one must learn to run down a hill without looking down the hill. It’s kind of like rubbing your belly and patting your head. You probably have not spent much time running down steep hills, but if you have, you probably didn’t try to look out , you probably naturally looked down the hill. A smart move if you are concerned with where you are ultimately headed. But the wing will eventually, upon reaching the magic speed, redirect your path more forward than downward, so looking out is critical for steering purposes.
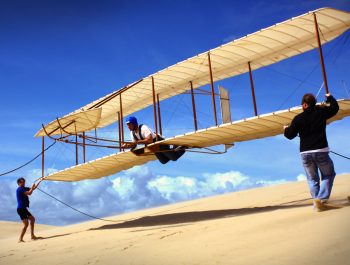
- you must be relaxed. Easier said than done, but being comfortable with the task at hand, and flying with a relaxed grip, is essential to the learning curve. That’s why we choose the type of training gliders that we use, and the soft sand to train on. We start with short training flights on slow flying Rogallo (learn more about Francis Rogallo aka father of modern-day Hang Gliding) type gliders, gradually moving forward to more advanced gear. It’s important for students to understand that instructors are trained to recognize signs of anxiety, and when we see that a person is uncomfortable with the task at hand, we will reassign a new task that can be practiced on shallow slopes to perfection before moving on. A student must be relaxed because responding to a lifted wing involves detecting the lifting force, and this is easy to do provided the pilot is relaxed, with eyes focused forward and comfortable with the task at hand. The fact that we have so many different types of slopes facing so many directions makes our training hills the best possible place in the whole world to learn to foot launch.
In the beginning, the launch process can seem overwhelming, but it’s actually quite simple, and lots of fun to learn. Let’s remove the training wing for illustrative purposes. Running full speed down the hill without the wing attached, you would lose your balance because gravity would give you too much speed for your legs to accommodate. So running downhill, especially big, steep ones normally would result in a tumbling mess. Gravity has its way with us, we gain incredible amounts of speed because we are falling while we are running, and we are likely to not maintain our balance.
That’s where attaching the wing comes in. The wing creates increasing lift forces that help us to maintain our balance while our feet continue pushing the ground underneath them. We continue to accelerate until all of our weight is transferred from the bottoms of our feet to our harness straps. The straps seem to be getting “tighter” as they assume a larger and larger percentage of our body weight. When you reach a certain speed, the ground disappears below your feet as you find your “run” down the hill has gradually morphed into flight, your weight has gradually shifted from your feet to your straps, and you are free! Simultaneously, the hill is also getting steeper which sometimes creates the illusion that altitude is actually being gained. It is truly being lost, but who cares, it feels like “lift-off”! Hello again, superman! But that is it, no magic, actually very, very simple. The moment of takeoff, or “lift-off” for you superman-types, is an exhilarating feeling and one you will want to repeat often.
relax … it all comes together soon
In the perfect training hill launch, this take-off process happens gradually, not suddenly. This is the reason that cliffs make bad training hills. Slope matters, and the size and shape of the training hill is very important. We are lucky that we have so many perfectly shaped hills in our training area. If we keep running, without hesitation, always accelerating, we are either at the bottom of a shallow hill or airborne if the hill gets steep enough! That’s it! Very, very easy! Hesitating against the force of gravity is the culprit in most blown launches, mostly due to anxiety and its effects, so the steepness of the hill matters greatly during the learning process. We start on shallower slopes, developing our balance skills, and then move onto bigger hills as our ability to balance becomes better.
This should help explain why we don’t have minimum speed requirements for signing up for lessons. Your ability to gain airspeed has more to do with how the hill is shaped, how much wind is already blowing, and how good you are at using the lift forces to maintain your balance as you continue to accelerate down the hill. On most days all it takes is a steady jog! The Wright Brothers understood this very well and it explains why they also chose to train here too.
You can, however, hesitate against the force of gravity. The glider, not having a brain, will blindly obey the laws of gravity, so if you hesitate, you will be likely to lose your ability to keep your balance as the glider gets in front of you. But this doesn’t happen with an instructor’s assistance, because they will run with you to prevent you from hesitating against the force of gravity, even if you try. And they can help you achieve balance in roll while you are accelerating. One thing that can be said with certainty is that instructors, especially the ones out here, can likely outrun you! The result is a safe and easy foot launched flight lessons! We teach about 5,000 students every year!
in conclusion
- listen to your instructor
- start with the proper gear and hill shape
- keep your eyes up
- relax!
That is all that is required, and anyone can do it!
Ready to get started?
Schedule a Beginner Lesson Now!
Need more information? Find out more about Hang Gliding Lessons and Training with Kitty Hawk Kites or give our staff a call at 252.441.4124.
Kitty Hawk Kites also sells Hang Gliding Gear. Feel free to give the Flight School a call at 252-441-2426 if you have any questions about gear sales.


